

So as you can see from the "Before" photo, the counter space where there is no sink becomes a gathering place of all the products we use daily but have no real place to store. I hate it be cause it just become so messy. (This photo shows it extra messy because we had just gotten back from travelling, and all our travel products are out still.) If this were the bathroom in a property I owned, I would maximize the storage space by adding built in shelves up the wall. So I did the next best thing.
These shelves are actually spice racks from IKEA (Love that place!) and are only $3.99 each - can't beat that! They come in unfinished natural wood, and take about 5 minutes to put together. (You don't need a power tool, I just like to use mine. :) )

As much as I like the natural wood, I decided it matched the (ugly) color scheme of my bathroom better if painted them an off-white, which I did with some basic acrylic paint.
The shelves hang on the wall with two hidden screws (which the shelves do not come with). To properly mark where the holes should be on the wall, I used the instruction paper that came with the shelves (recycle - I try to be green whenever possible), and taped it together to make a piece of paper longer than the shelf itself. Then I turned the shelf over so it was resting on its front, and the screw holes in the back were up, and I placed the paper over and lined the bottom edge of the paper up with the bottom of the shelf (so the holes would be level) and found the holes and punched through the paper so I now have holes in my paper where the screws would go.
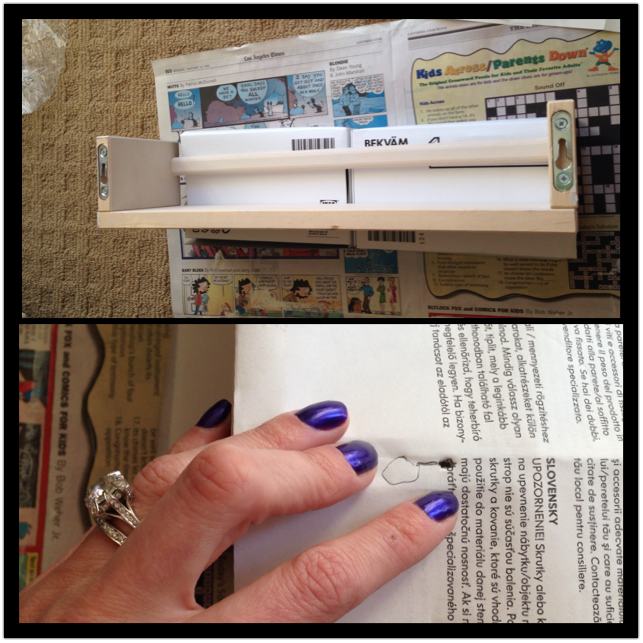
Then I went in the bathroom with my paper, and eyeballed, based on the holes, where I wanted the shelf to go, starting the the bottom one. I put a lotion bottle up against the wall to give me an idea how high the shelf should be to allow me to put items under it on the counter. I taped the paper to the wall. Then I got out my level, and lined it up with the bottom of my paper (since the bottom of the paper also lines up with the bottom of my shelf) and adjusted the paper taped to the wall so that it was level. Then I marked the wall through the holes I had punched in my paper. I took the paper down, drilled the holes, inserted anchors and screwed in the screws. One shelf done.

I followed the same thing for the second shelf, with the first shelf in place during the measuring of the placement. I put the same lotion bottle on the shelf that was currently attached to the wall to give me an idea of how high to put the second shelf, and then added and inch or so to the bottle height. Eyeballed the placement of the paper and taped to the wall. The only extra step here is if you want the two shelves to be in line with each other vertically, once you have the general idea of where you want the shelf horizontally, you need to use a level and straight edge to make sure the holes you mark for the top shelf are horizontally in line with the bottom shelf.

Despite no comment from my husband when he got home until I specifically asked him about it, I am very happy with the result. Now, this is not an excuse to put MORE stuff on the counter since it is now all on the wall! It makes it not so bad when I have to get up and get ready for work in the morning, when I walk in to the bathroom and see my neat handiwork. :)

No comments:
Post a Comment